
How to draw Rapunzel. There are many fairy tales and classic stories that have delighted children around the world for generations. Some of these stories protruded as others, and the story of Rapunzel is one of the most famous. This story appeared in many books and new editions and saw cinematic adjustments from studios like Disney. With so many fans worldwide, many people would like to learn to draw Rapunzel alone. This guide shows you how to do it!
We hope you are happy to work on this step-by-step instruction for drawing Rapunzel! If you are looking for coloring pages, then you are at the right place because we share many types of adult coloring pages like Christmas coloring pages, Halloween coloring pages, dog coloring pages, cat coloring pages, dragon coloring pages, horse coloring pages, and flower coloring sheets.
Drawing of Rapunzel
Step 1:
In this first step in our instructions for drawing Rapunzel, we will start with our heads and hair. It will be a fairly detailed drawing, so it can recommend to use a pencil first and follow the reference image. His eyes are big and round with some great students in them. His face will be a little rounded with simple thin lines for the mouth and nose. So we will start drawing your thick hair, located in different sections. Once satisfied, you can continue as it appears in our reference picture!
Step 2:
We will draw the second arm and extend our hair in this second part of your Rapunzel Drawing. His arm is bent on the elbow so that his forearm slaps his hand under his face. So you can draw some small rough lines for the collar of his dress. Finally, he uses some slightly curved lines that go down to continue his long hair.
Step 3:
In the next steps of this manual, there are many details on how to draw Rapunzel. So take it slowly and have fun! We will use some curved lines for the shoulder of his dress to start. So you can draw the breast and life with some complicated details that dropped down into the middle for the rope with which it fixed the dress. It may seem a little complicated, but if you refer to the sample image, you are fine!
Step 4:
You make great progress in this Rapunzel Drawing! For this step, we will concentrate on the other arm. With some slightly curved lines that go down, you can draw the other arm that hits directly from the shoulder of his dress, which you have previously designed. With this drawer, you are ready for step 5!
Step 5:
It is time to draw the rest of the dress in this fifth phase of our guide to drawing Rapunzel. The dress has many curved lines of different lengths that climb and connect. It will help represent the fabric’s flow and give it a more dynamic appearance. As soon as you have finished the dress, we only have a few final details before coloring your drawing, which you can add in the following steps.
Step 6:
One of this character’s best-known properties is his long hair; we will end it in this step of your Rapunzel Drawing. To do this, we will use bold lines descending from the hair and feet. It’s so easy, and now you are ready for step 7!
Step 7:
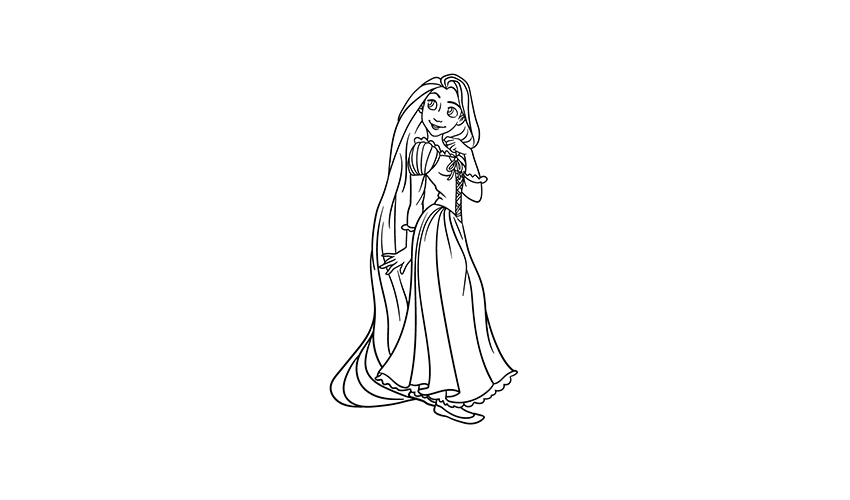
It is almost time to color this photo, but we have some last aspects we can attract in this step of our guide to drawing Rapunzel. First, you can use more rough lines at the base of your dress to end the edge. So you can draw your feet under the base of the dress to end it. It will do so for our details, but you can add some if you want! You could draw a background to show your favorite scene from the film. You could also look for other characters that you like from history and draw them next to Rapunzel. How will you end this drawing before the last step?
Step 8:
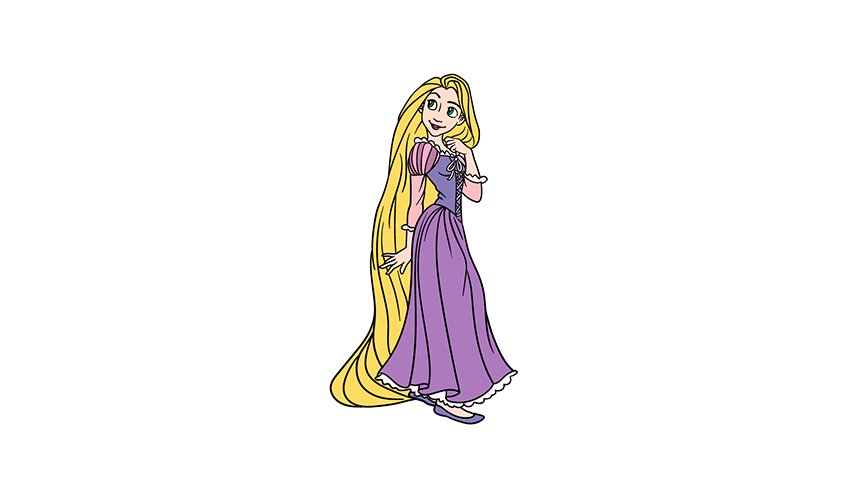
It leads you to the last step of your Rapunzel Drawing. In this part, you can enjoy adding some incredible colors! In our example, we showed you how it appeared in the film, and for this reason, we used beautiful yellow for your blond hair with a combination of pink colors for your dress. You can use this picture as a reference point for your colors, but you can also change the combination of colors to your favorite colors if you prefer it! If you want the colors to be beautiful and bright, you can use funds such as colorful pens and acrylic paint for some examples. Alternatively, you can use some colored watercolors or pens for breastfeeding the image. What colors and medium do you use for this photo to finish?
Take your Rapunzel Drawing to the next level.
Celebrate this legendary character while we make your Rapunzel sketch even better! This drawing of the Rapunzel exhibition is in a simple, cute pink and purple dress. It is an excellent look for her, but you could also give her a brand-new look! It could be easy to keep the drawing of your dress but change the colors to those you prefer. Or you can give him a completely new dress and other accessories. Rapunzel is combined with other characters who have also learned fans in the film. It can also add these to the picture for a little more fun!
One of the most obvious would be the film’s delightful Flynn pilot. It would be a great addition, but you could add any other figure you love from the film. When adding other characters, it is optional to adhere to the only characters of this film. Adding characters from other Disney films to their Rapunzel Drawing would also be fun! First, they could show what it would be like to meet other Disney princesses they love. It would be a fun way to imagine a fantastic Disney crossover! Who would you like to meet, Rapunzel?
You can draw a background if you have solved all the desired characters for this drawing. It would be a great way to present some of your favorite scenes from the film. Freeze the film in a scene you like, so use it as a reference when drawing. Or you can choose some other beautiful settings that Rapunzel is part of! The most famous aspect of Rapunzel’s character should be his hair. It can be designed with pens and other artistic tools. You could also use other funny handicrafts to present it! You could use something yellow band or wrong hair locks. What other art materials could you use?
Your Rapunzel Drawing is complete!
You have added your colors and final details, which means you have completed this guide for drawing Rapunzel! Many details were to be done in this picture, so they should be proud to do excellent work. With a new picture, it always helps to divide it into smaller and more manageable steps. Now you can call it up with your details and colors. You can’t wait to see what you do! If you are ready for more fun, visit our website for other extraordinary leaders. We like new ones from new ones, so we hope to see them often! As soon as your Rapunzel Drawing is ready and colorful, remember to share it on our Facebook and Pinterest sites so that we have fun!
Also Read: How Porcelain Teeth Veneers Can Transform Your Look